


The Brave & The Bold #204 - Batman and Liberty Belle - homage to Marvel Team-Up #57
Artist: Bambos Georgiou (All)
2 Comments - 678 Views - 2 Likes

Additional Images:

Pencils

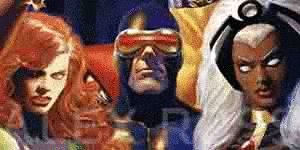
Marvel Team-Up #57 - source
Artwork Details
|
DescriptionNew commission: the fourth issue of my Golden Age Team-Up Project series (The Brave And The Bold #204), pairing Batman with Liberty Belle. Art by Bambos Georgiou, adapted from the cover of Marvel Team-Up #57, original art by Dave Cockrum.1942 - and as Batman drops off the plans for the Axis brainwashing machine, seized last issue, at the Perisphere, he finds Liberty Belle (secretly radio broadcaster Libby Lawrence) in conversation with Dave (Midnight) Clark. Both of them have had recent broadcasts interrupted by Axis propaganda, although alert engineers managed to take the stations off the air before too much was transmitted. Batman realises that this must relate to one of the files - referring to Project: Radio-Wave - which he'd taken from Baron Blitzkrieg's base in issue #202 and only partially decoded. Although Dave Clark needs to get back to his station for a broadcast, once Liberty Belle has made a quick call to radio engineer Alan (Green Lantern) Scott and discovered similar issues have affected his station, the two heroes triangulate the possible source of the interference and set off in the Batmobile. Arriving at an out-of-town generating station, Batman and Liberty Belle sneak in, to discover Axis agents preparing their equipment to once again interrupt radio broadcasts, under the watchful eye of --- Sumo The Samurai! Leaping into battle, the two heroes disable the Axis equipment, but Liberty Belle is caught unawares by Sumo, who prepares to execute her! Only a near-suicidal dive from Batman saves the gallant heroine's life, and the two fight back, almost overpowering their opponents - but the Japanese villain is able to slice through a supporting beam, bringing the roof down, and trapping the heroes for just long enough that Sumo and the Axis agents can escape. The radio plot is foiled, but the battle to stop the Axis schemes will continue - next issue! Social/Sharing |
About the Owner
|
Contact the OwnerUse can use a contact form to send an email to this gallery owner,
|
Comments on this Artwork
You must be logged in to make comments.
Marcus Wai ![]()
Member Since 2005
1 - Posted on 10/21/2021
Great redo with a stirring rendition of great action and a riveting scene putting Liberty Belle's plight in uncertainty. The linework stays true to the original style, but the changes are well thought out and quite suited to the continuing storyline.
Aidan (Re-Legion ) Lacy ![]()
Member Since 2005
1 - Posted on 10/21/2021
The art is lovely, the storyline is PEFECTION !
Latest Updates
All |
|
Auctions ADVERTISEMENT
 |
"Jim Bob and the Alien" original art mag illustration Aboriginal S |
Auctions
| Larry Lieber The Amazing Spider-Man Daily Comic St |
Auctions
 |
FRANK FRAZETTA DEATH DEALER IV OIL PAINTING |
Auctions
 |
Jack Kirby - Journey into Mystery #86, Page 11 - The 4th appearance of Thor! |
Hakes Auctions
 |
STAR WARS #5 COMIC BOOK PAGE ORIGINAL ART BY HOWARD CHAYKIN. |


Subscribe to the YouTube Channel.. FREE!
 Japan Comic Art Expo
0 Accepting Commissions
Commission an Artist
For Sale Updates
Classified Updates |
|
Nikolaos K9/7/2025 3:59:00 PM |
|
Peter Marino9/7/2025 3:28:00 PM |
|
Arnaud B.9/7/2025 3:12:00 PM |
|
ERFAUKI D9/7/2025 2:59:00 PM |
|
Mugen R.9/7/2025 2:40:00 PM |
|
Brendon and Brian Fraim9/7/2025 1:01:00 PM |
|
Dealer Updates |
|
Will's Comic Art Page9/7/2025 12:25:00 PM |
|
Val Semeiks9/7/2025 12:15:00 PM |
|
Kirby's Comic Art9/7/2025 12:15:00 PM |
|
Essential Sequential9/7/2025 12:15:00 PM |
|
Achetez de l'Art9/7/2025 12:15:00 PM |
|
Galerie Daniel Maghen9/7/2025 12:15:00 PM |
|
|
Become a Premium CAF Gallery Owner & you'll be supporting CAF and also gain access to many services and features not available to standard members.
|